To shorten poles is not unusual. To lengthen them is not as common though. But after all, there is sometimes a need for longer poles. Children grow, or perhaps you yourself start to prefer slightly longer poles. For myself, as a father of three kids, it’s a constant struggle to keep skis, poles, and other equipment in phase with the children’s growth.
With bamboo ski poles, you can easily replace the bamboo cane, and presto, you have longer ski poles. However, if you only need a few centimeters longer poles, it’s easier to just extend the existing bamboo cane. Here, I’ll show you a tutorial step by step, both with photos and with video, how you can lengthen a pair of bamboo poles up to five centimeters.
A prerequisite for being able to extend the pole is that the grip conceals the joint. Keep in mind that this joint becomes the weak point. Therefore, I recommend that the extension is a maximum of half the depth of the hole inside the grip.
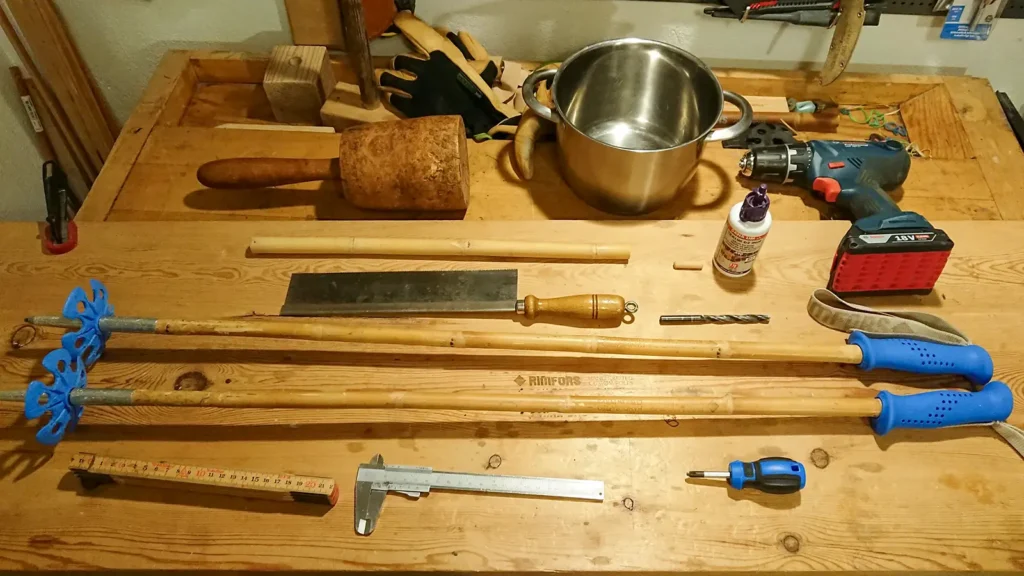
Materials and Tools
- Screwdriver (PZ2 for Rimfors poles)
- Pot with hot water
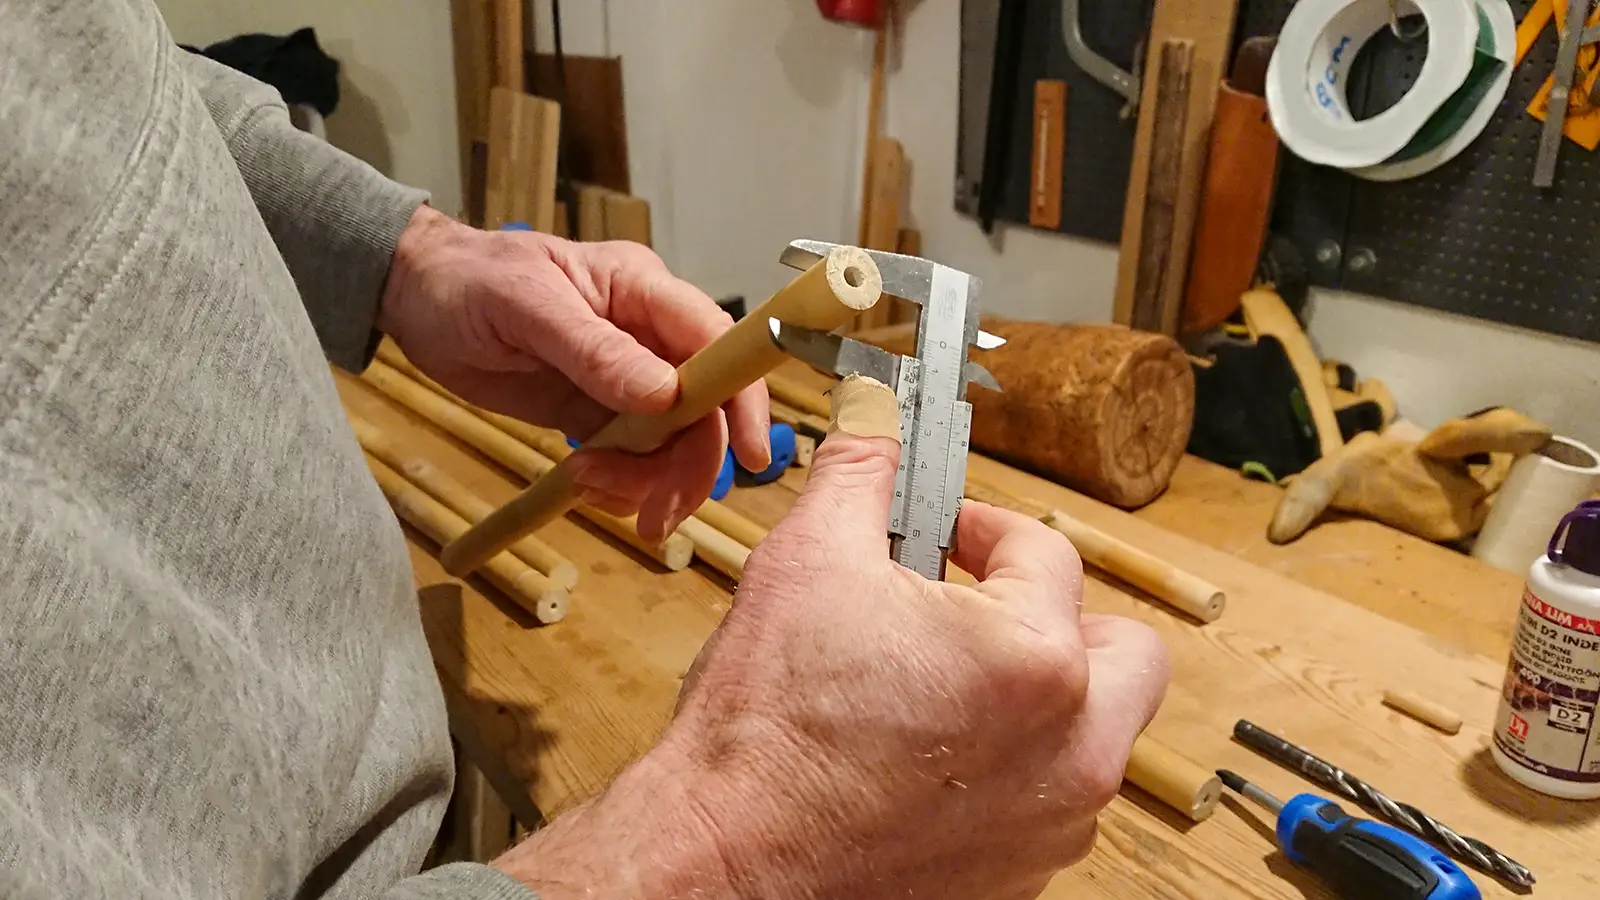
- Caliper
- Ruler
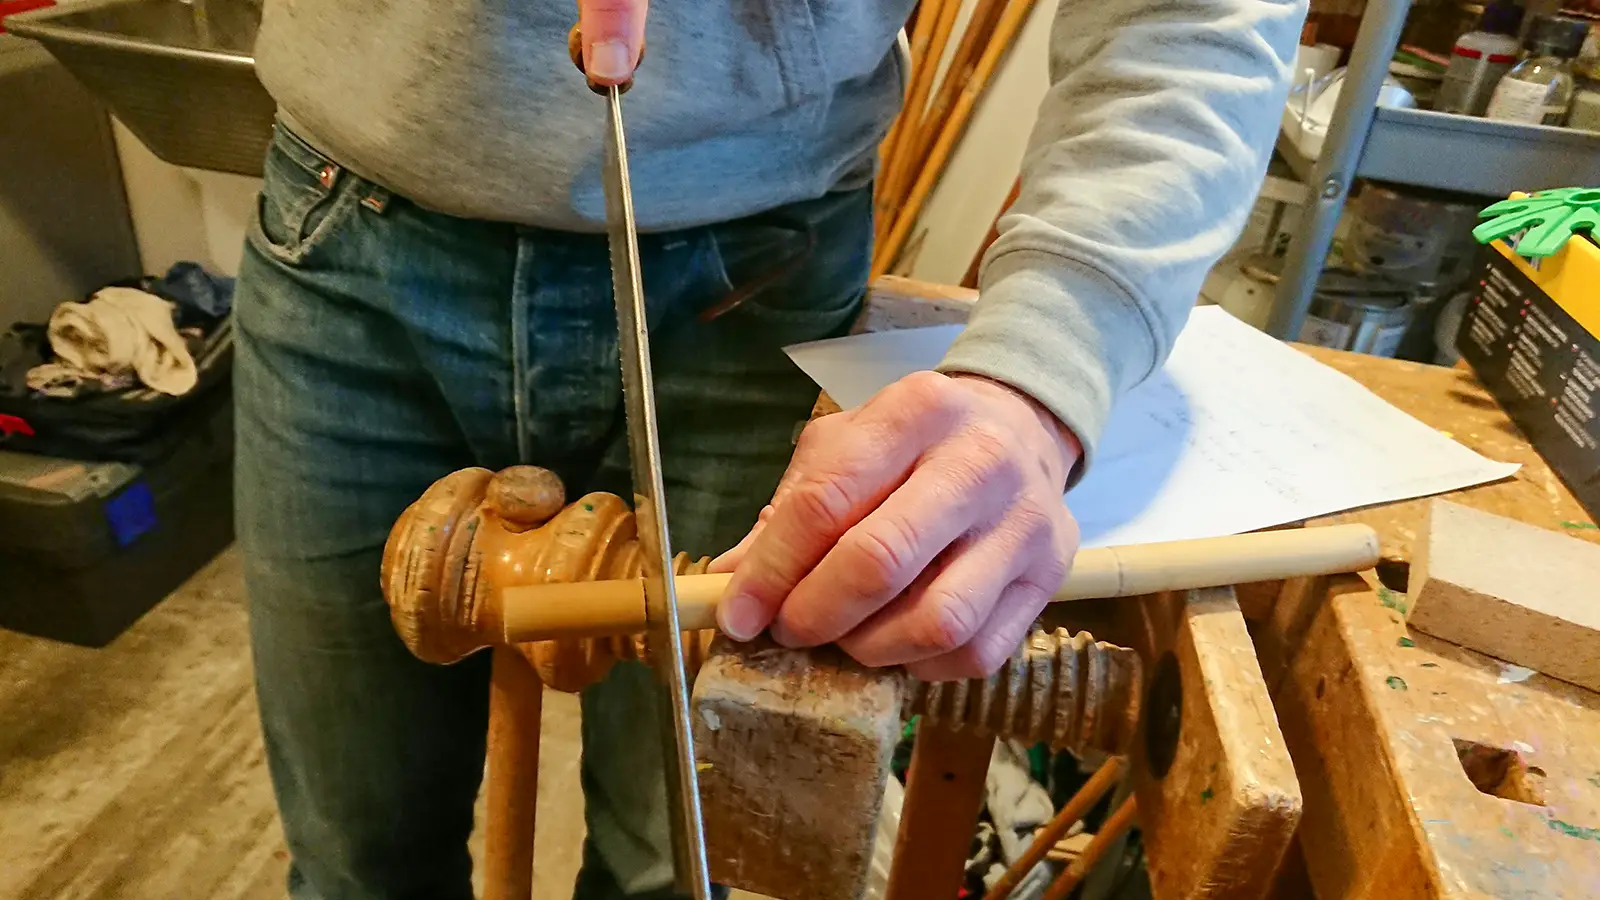
- Fine-toothed saw
- Bamboo piece with the same diameter as the pole
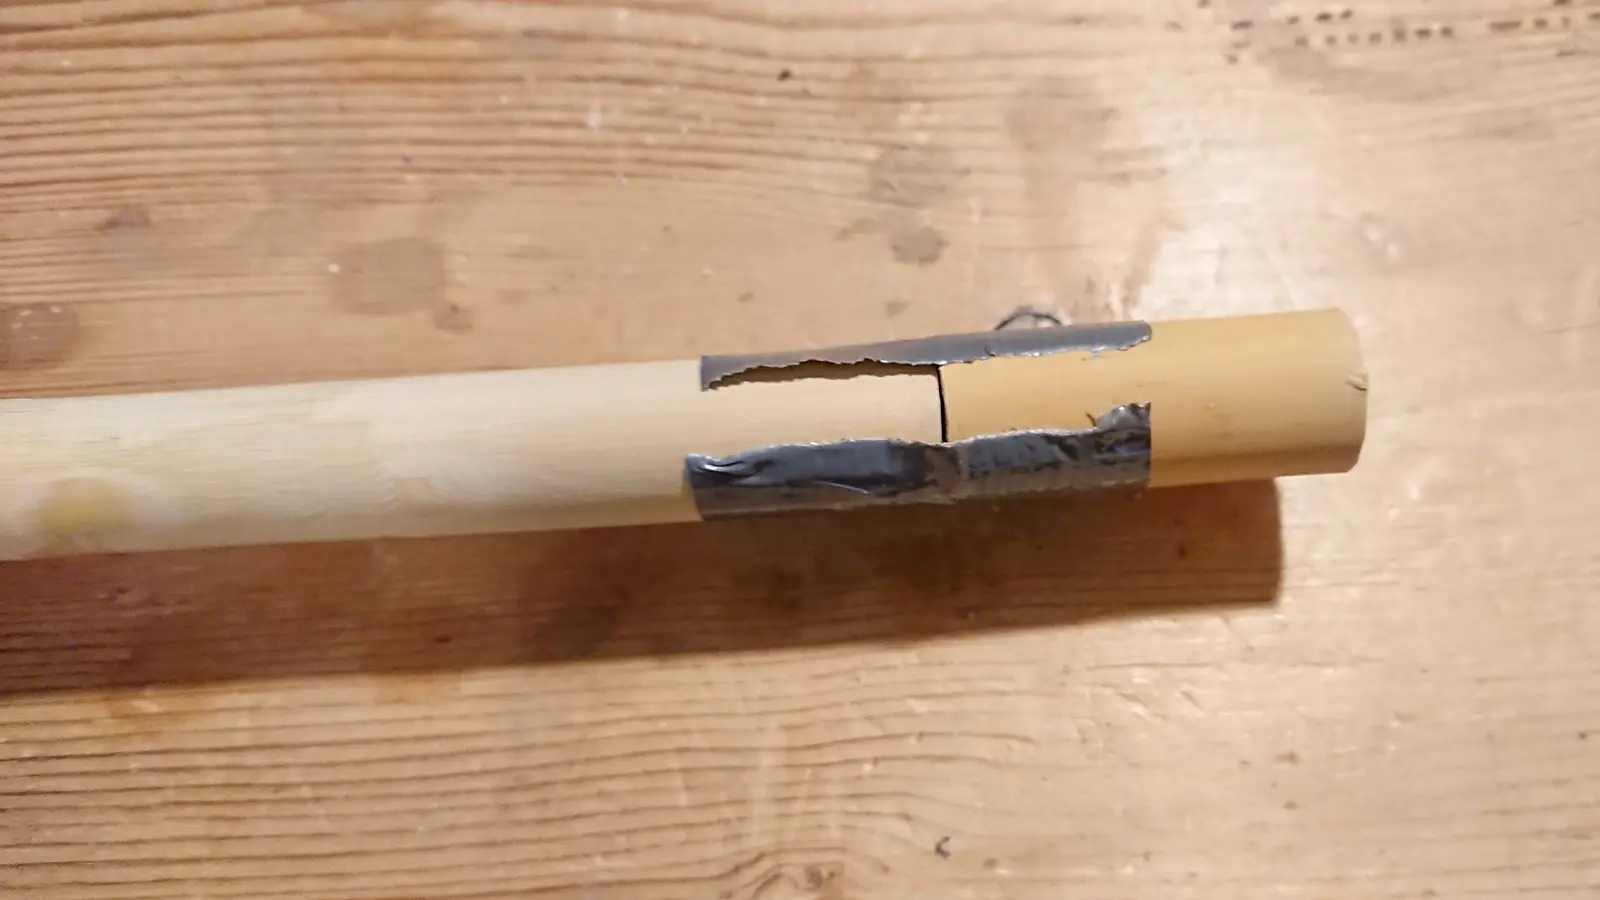
- Tape (strong)
- Workbench or vice
- Drill + drill bit matching the round pole
- Wooden plugs or dowel rods matching the drill bit
- Wood glue
- Liquid soap
How to lengthen ski poles—step by step tutorial
Time needed: 1 hour
How to do step by step
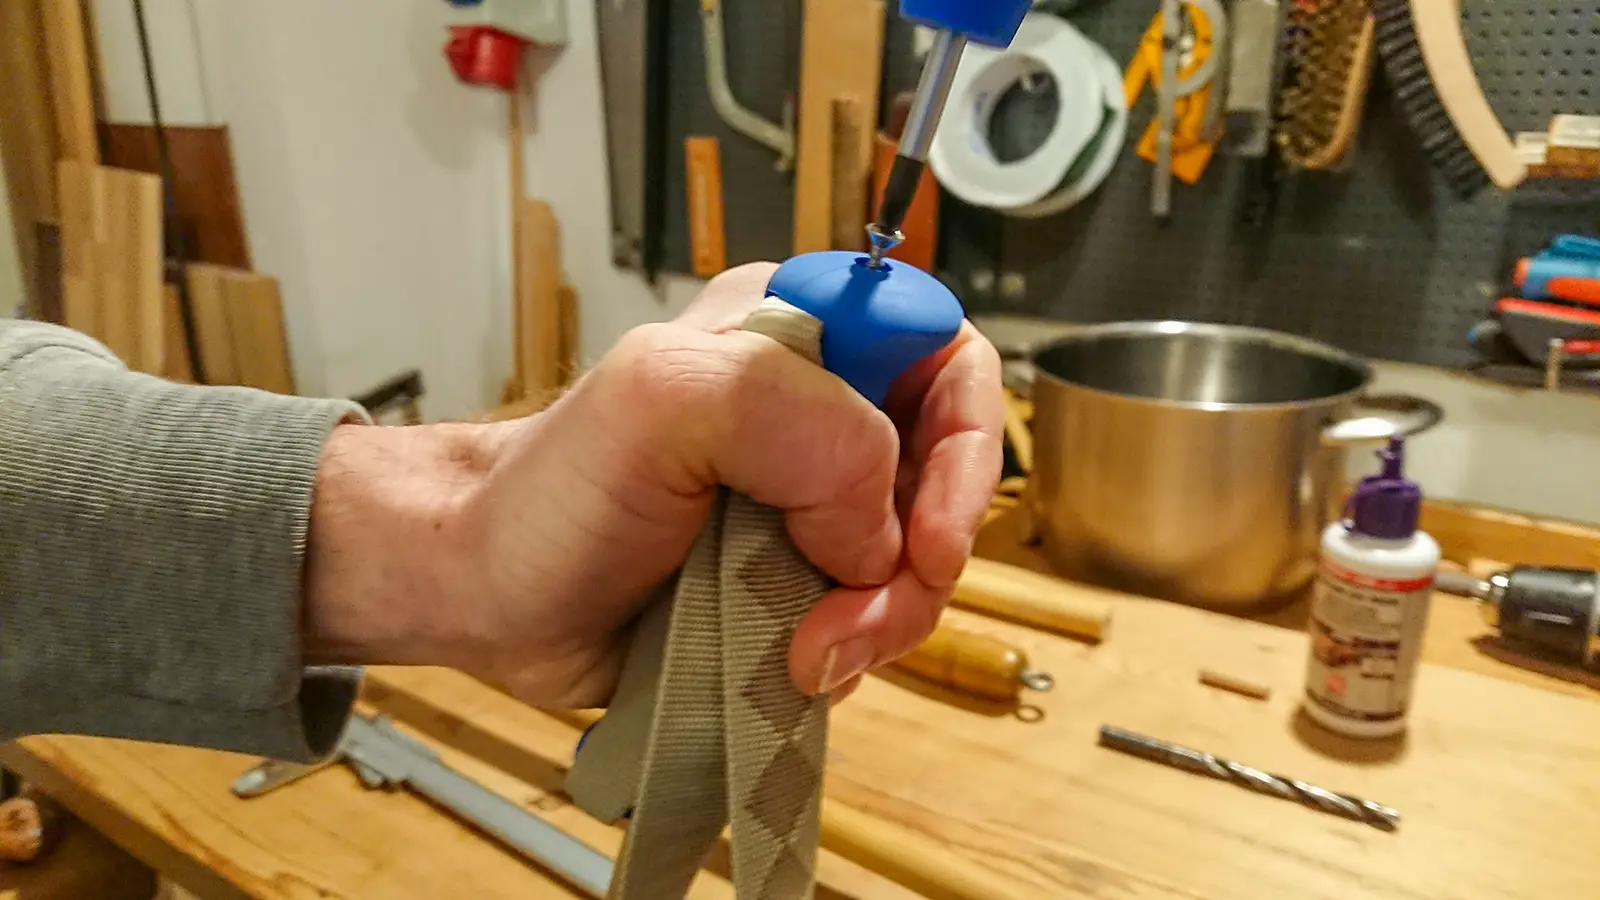
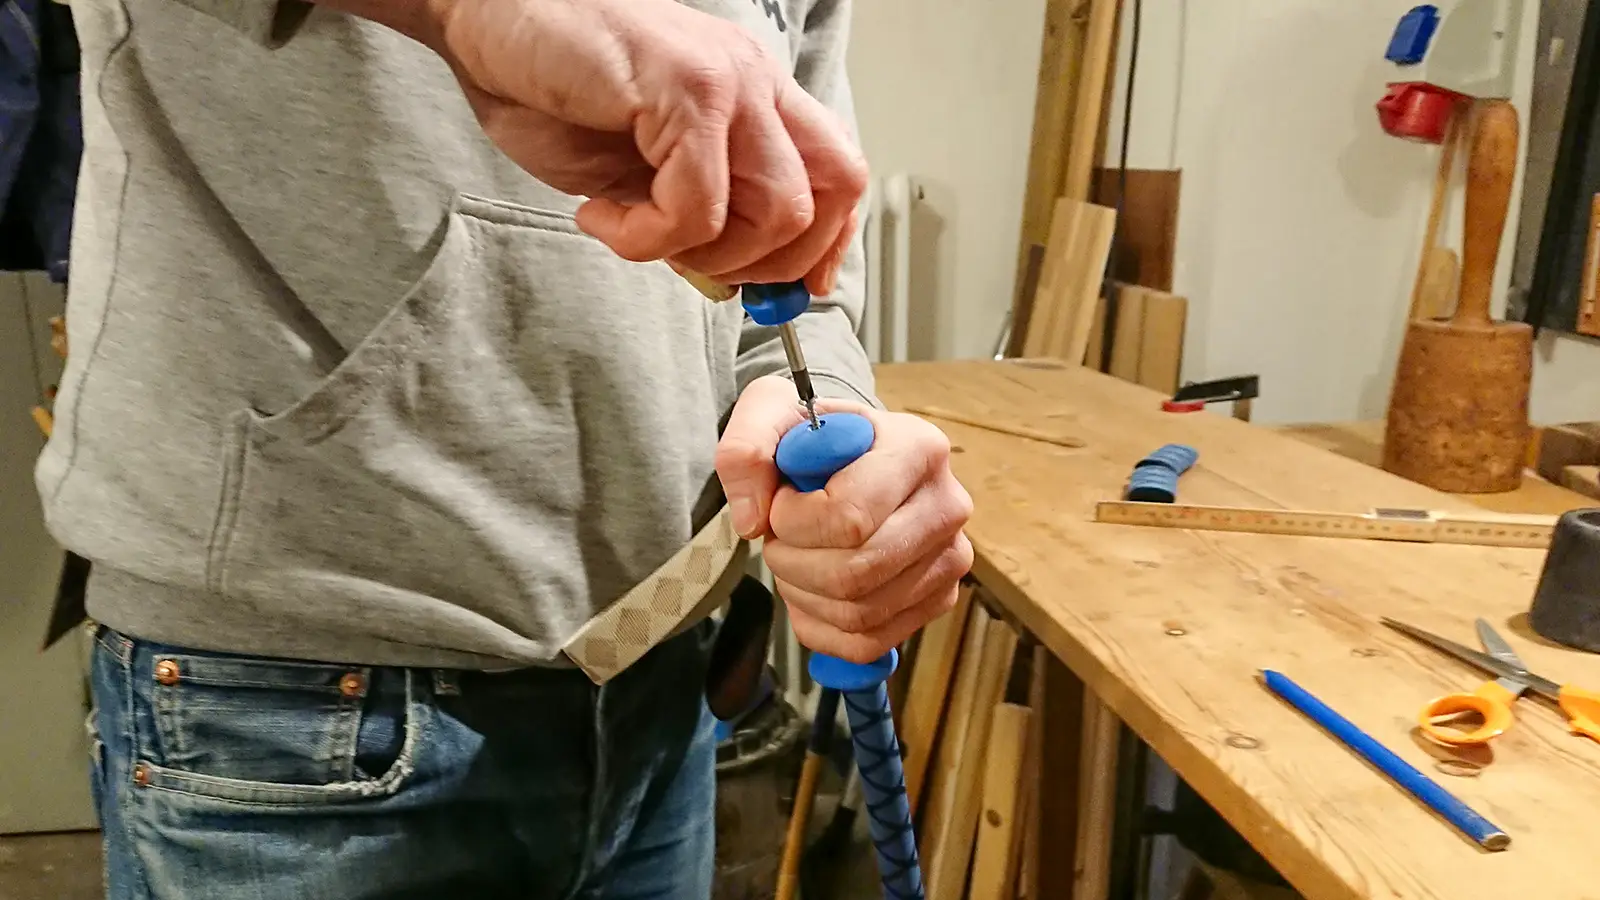
- Remove pole strap
Unscrew the screw at the top of the grip and remove the strap. On Rimfors poles I use screws with PZ2 socket.
- Boil water
Boil water in a saucepan. The entire grip must be able to fit in the water.
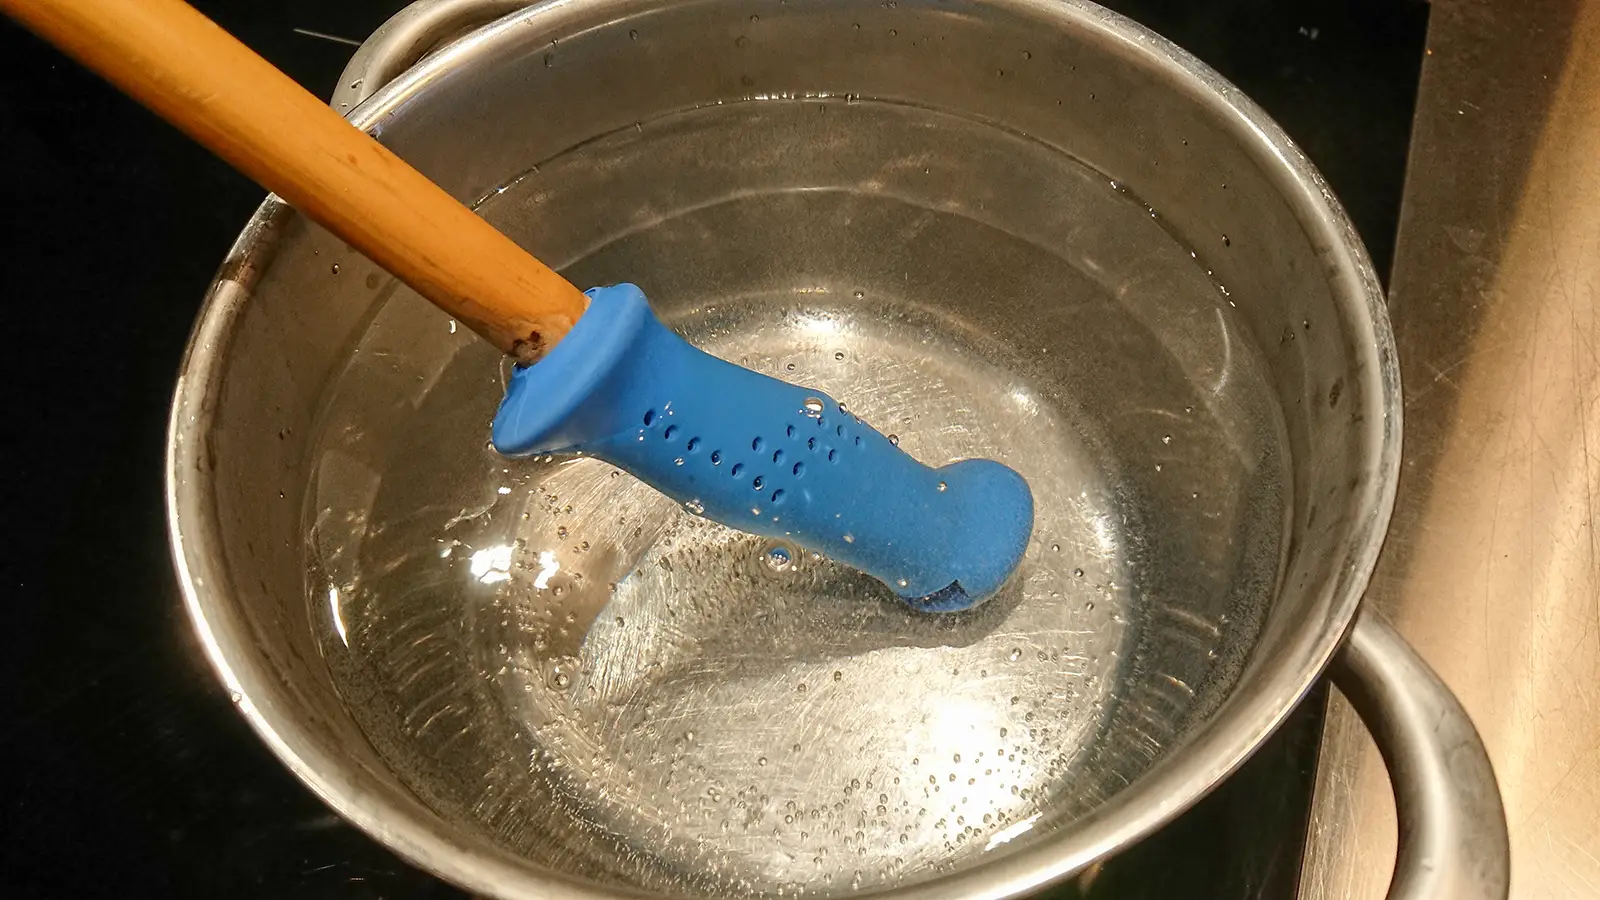
- Pull grip off
Dip the grip into the hot water. It usually takes 10—15 seconds to get the grip warm enough. Then pull and pry the grip off. Most often, grips are only pressed onto ski poles, but sometimes they are glued. Regardless, it’s easier to pull off with warm grips.

- Find appropriate extension
Measure the diameter of the bamboo at the top of the ski pole. Then find a bamboo piece with the same outer diameter.
- Cut for extension
Measure the length you want to extend with (maximum 5 cm) on the bamboo piece and cut with a fine-toothed saw.
- Tape the extension
Tape the bamboo extension piece securely to the end of your ski pole. Use duct tape or other strong tape.
- Fix the bamboo
Fix the ski pole with the extension piece in a workbench or vise. Both the bamboo pole shaft and the extension piece must be firmly fixed so that they don’t rotate when you drill.
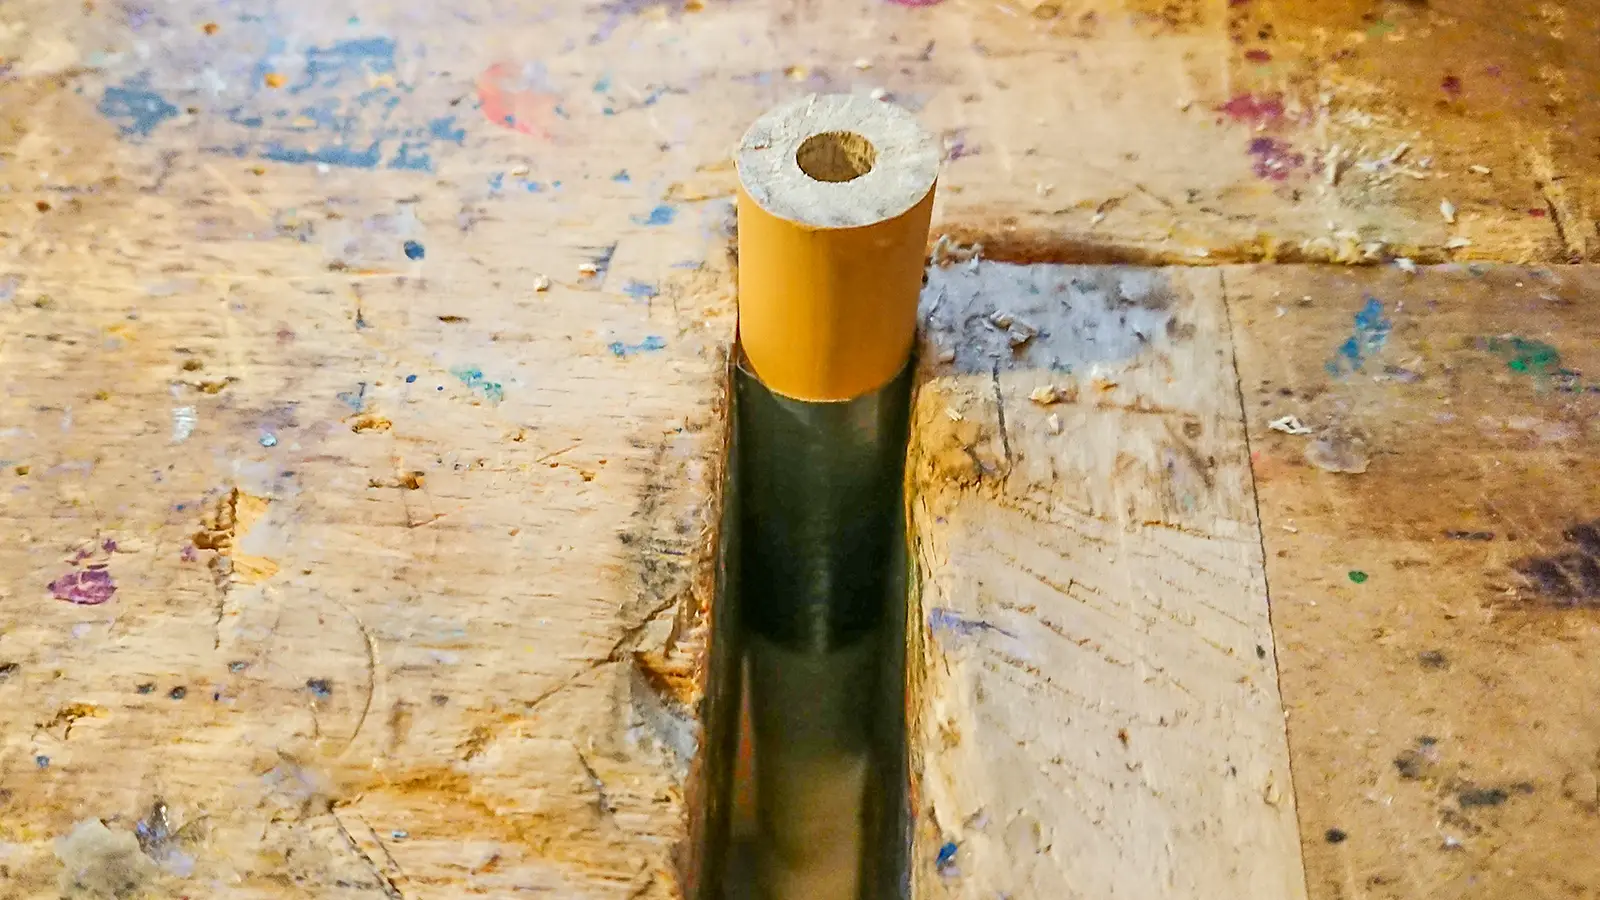
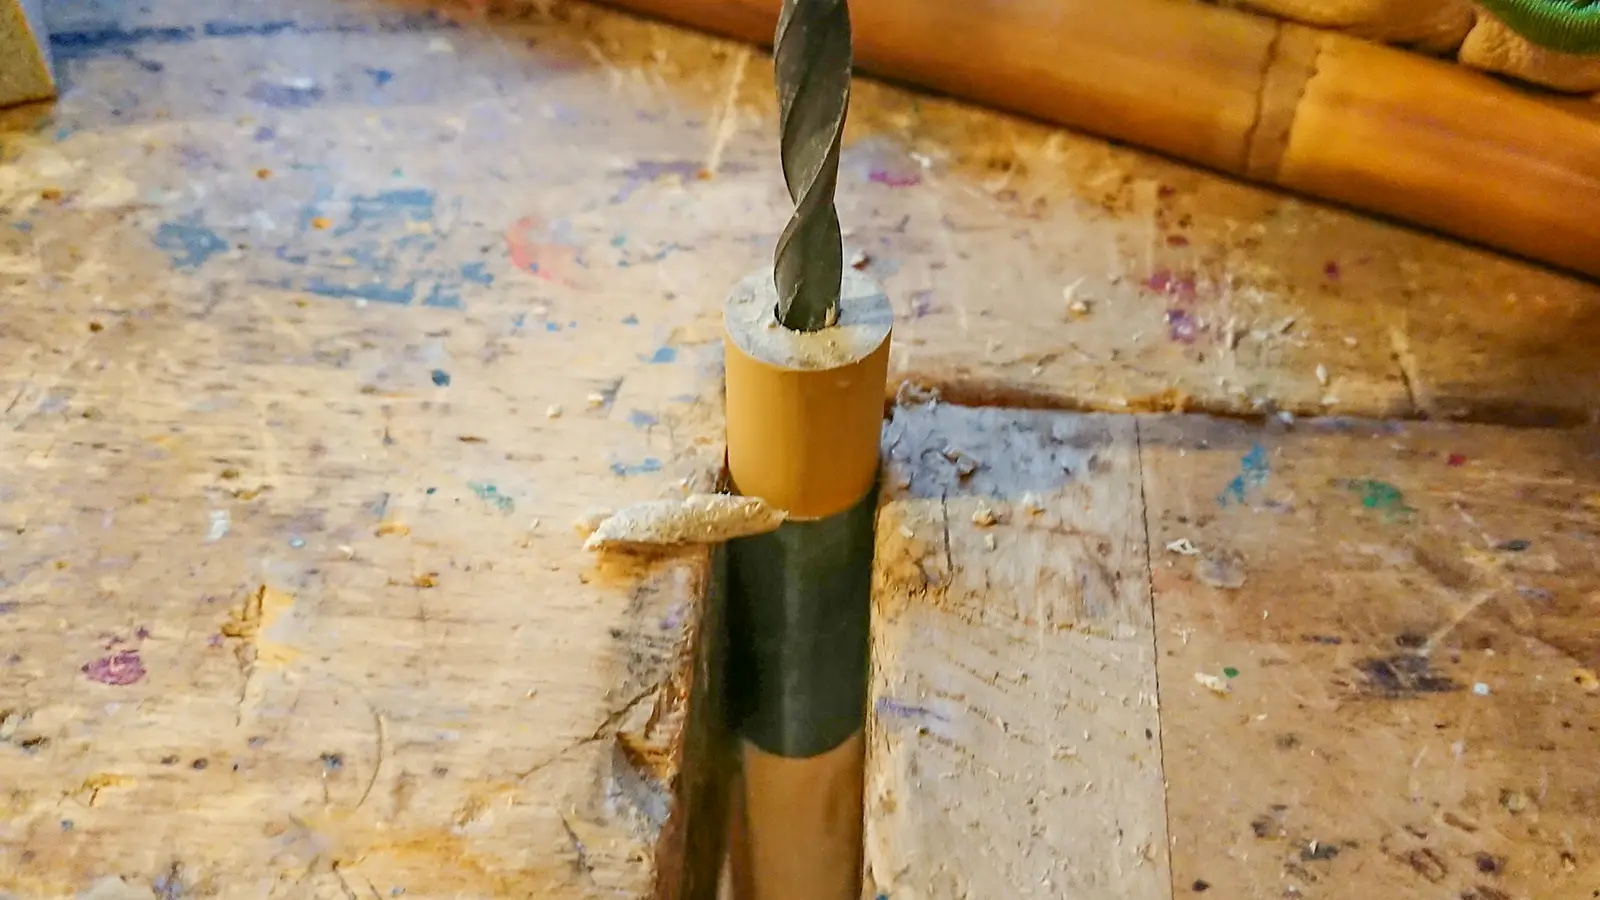
- Drill a new center hole
The hole must match the plug or wooden dowel rod you are going to use. The diameter needs to be at least a third of the outer diameter of the bamboo, but never more than half. Drill the hole through the entire extension piece plus another as deep as the extension itself. If you extend 5 cm, you must drill the hole 10 cm deep.
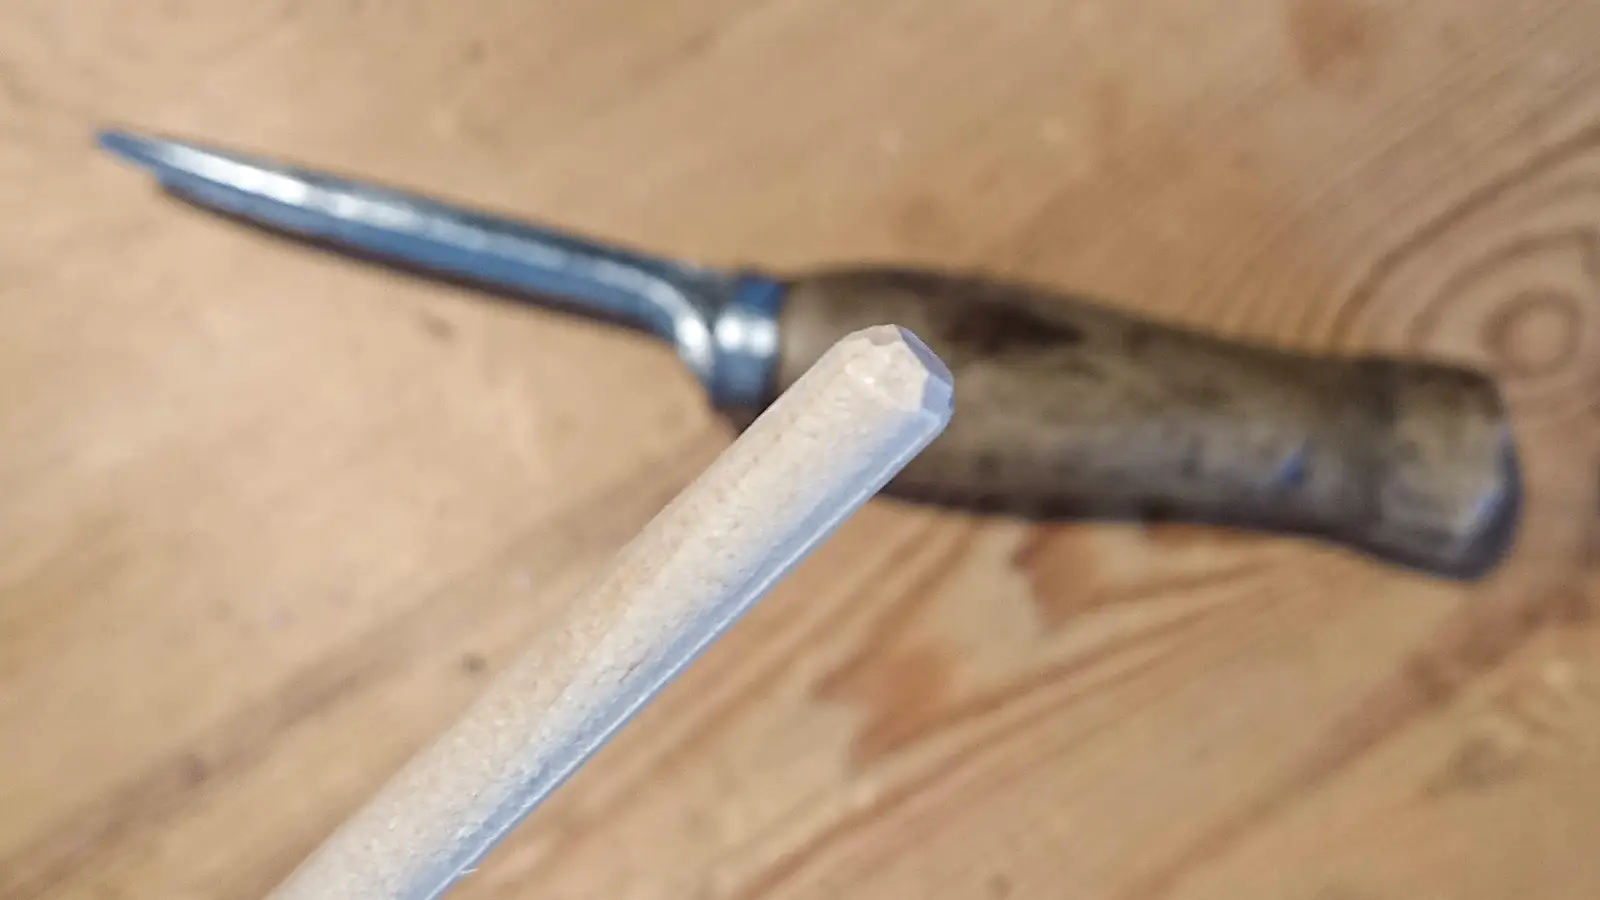
- Sharpen the dowel
Sharpen or bevel the edge on the dowel. This is to better distribute the glue when pressing in the dowel.
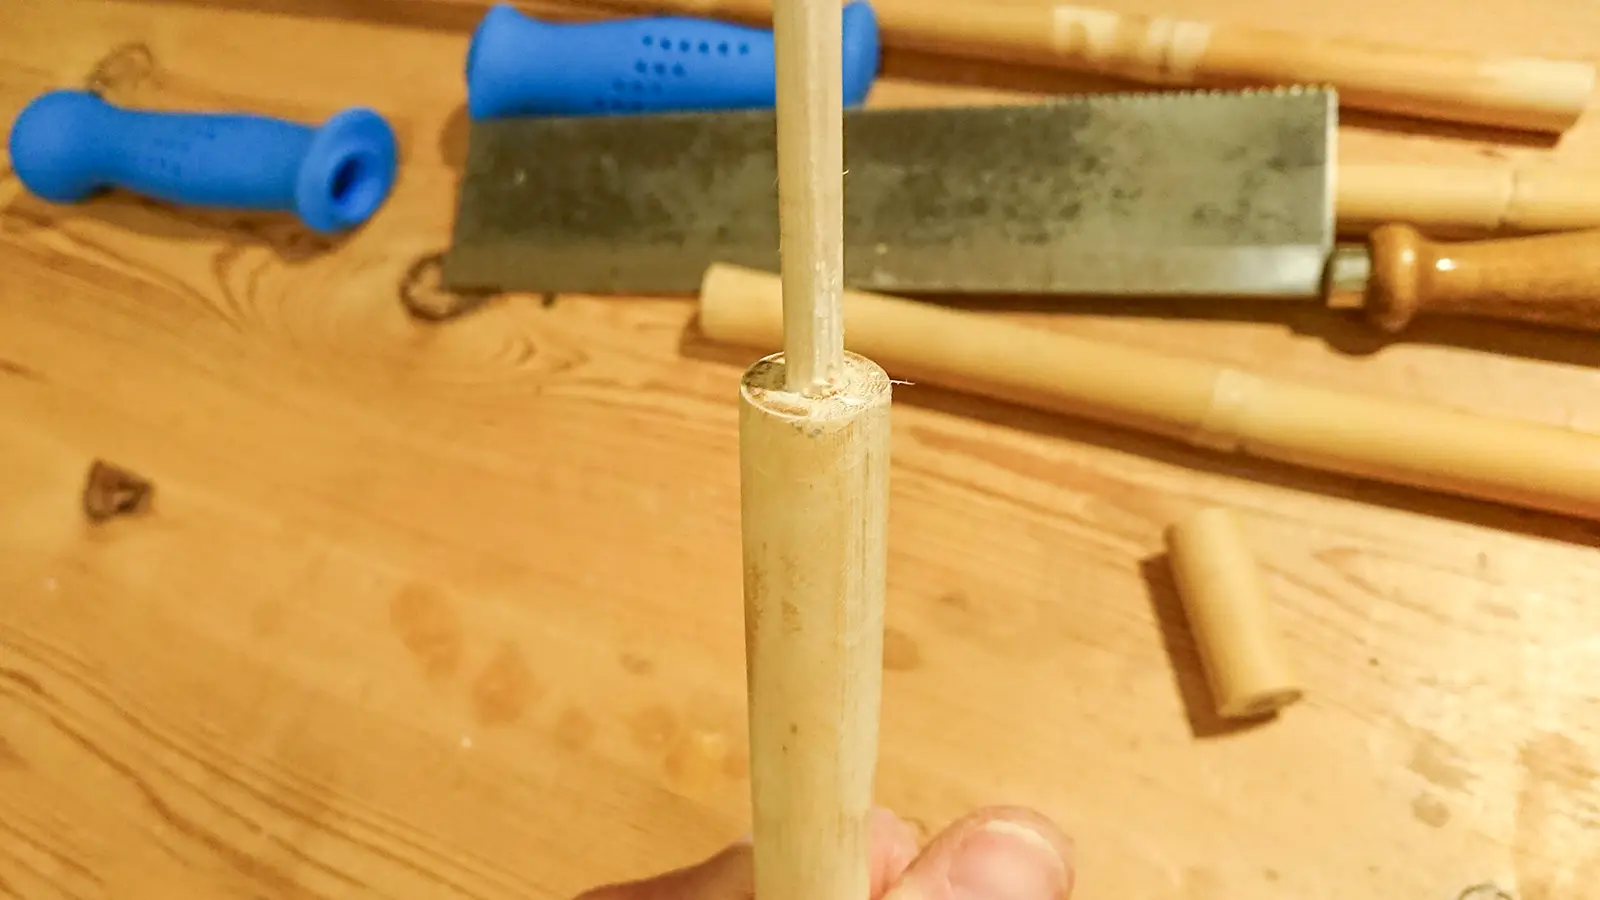
- Glue the dowel
Apply wood glue into the hole on the bamboo shaft and tap the dowel down. Note that the dowel needs to stick up the same length as the extension piece. The screw for the pole strap needs something to anchor into.
- Glue the extension
Apply more wood glue on both the dowel and in the joint. Press the extension piece onto the dowel and shaft. Keep the bonding under pressure for at least ten minutes.
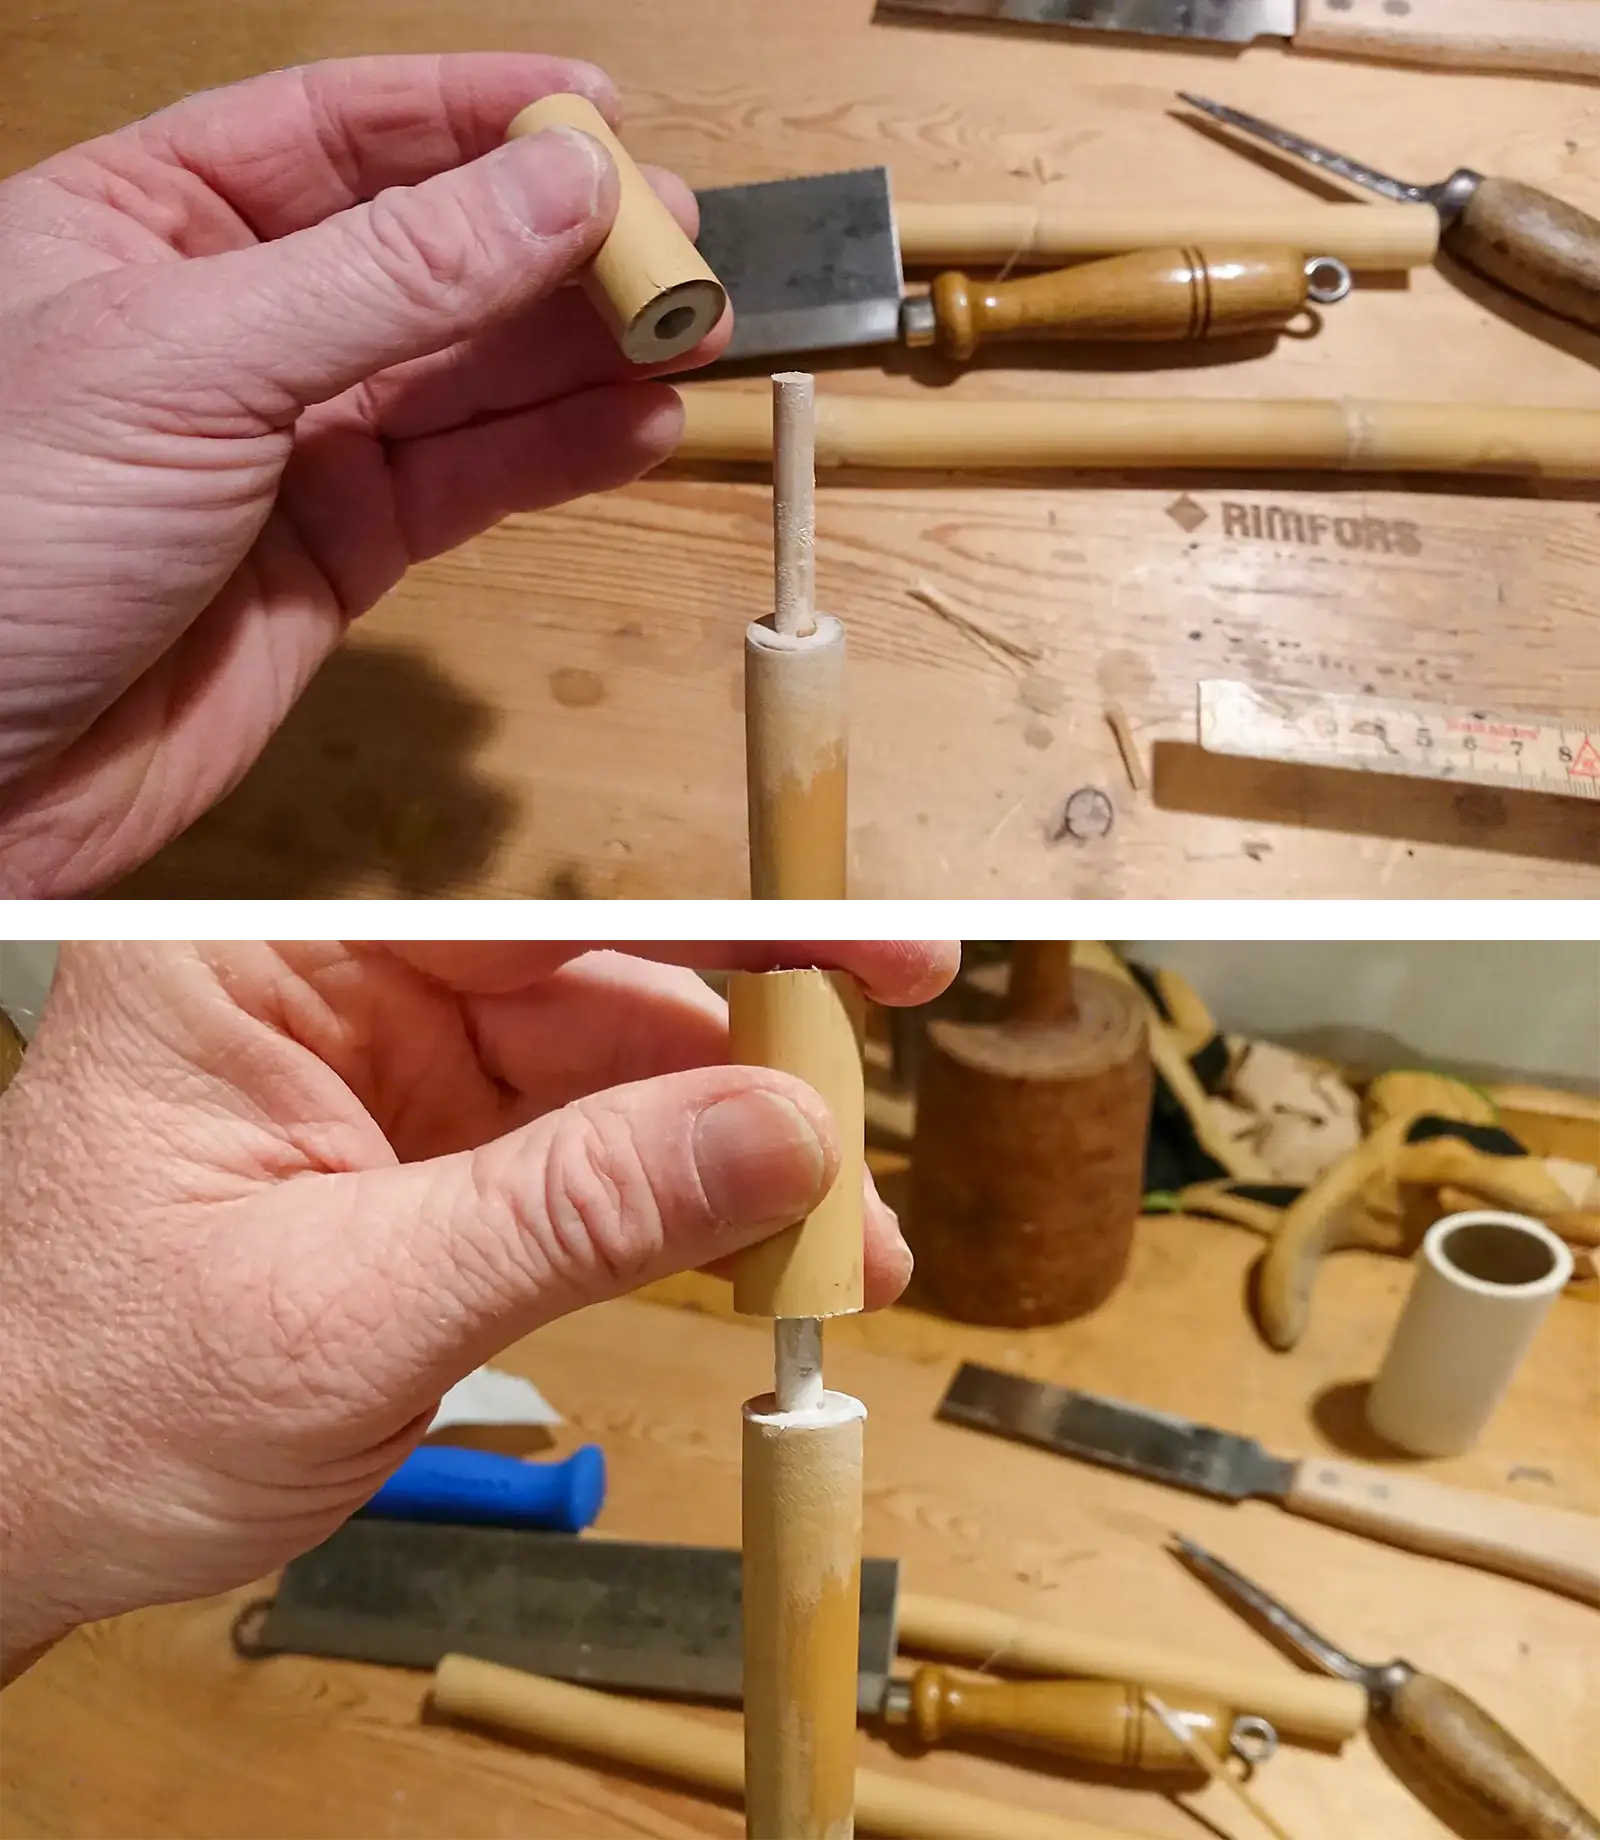
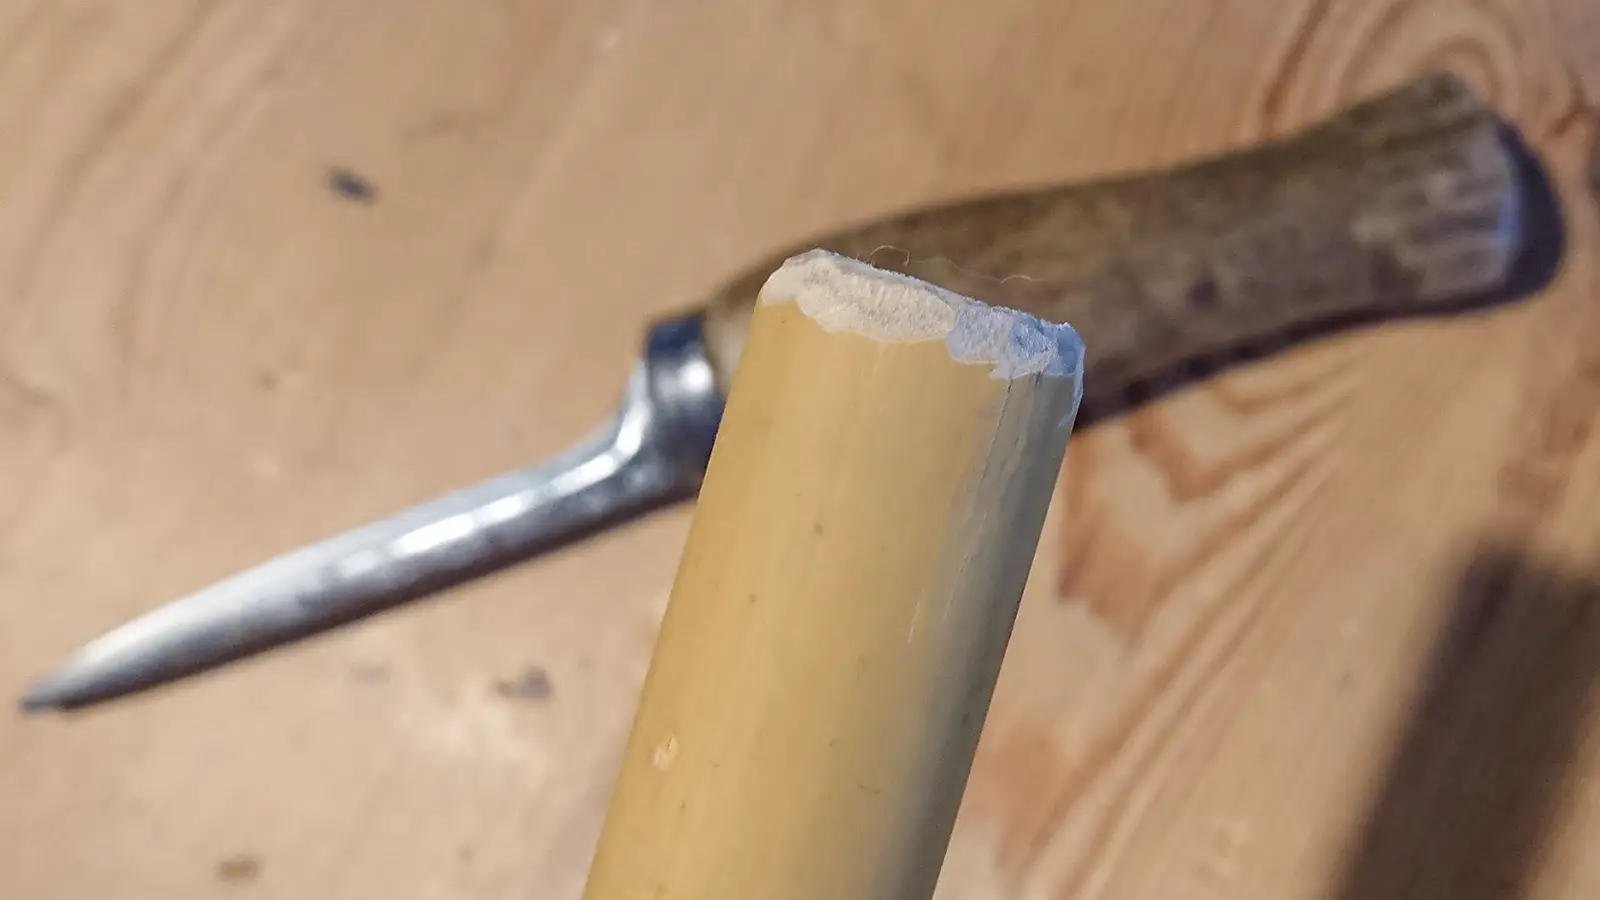
- Bevel the edges of the bamboo
When the glue has dried, bevel the edges at the top of the extended ski pole, either with a knife or with sanding.
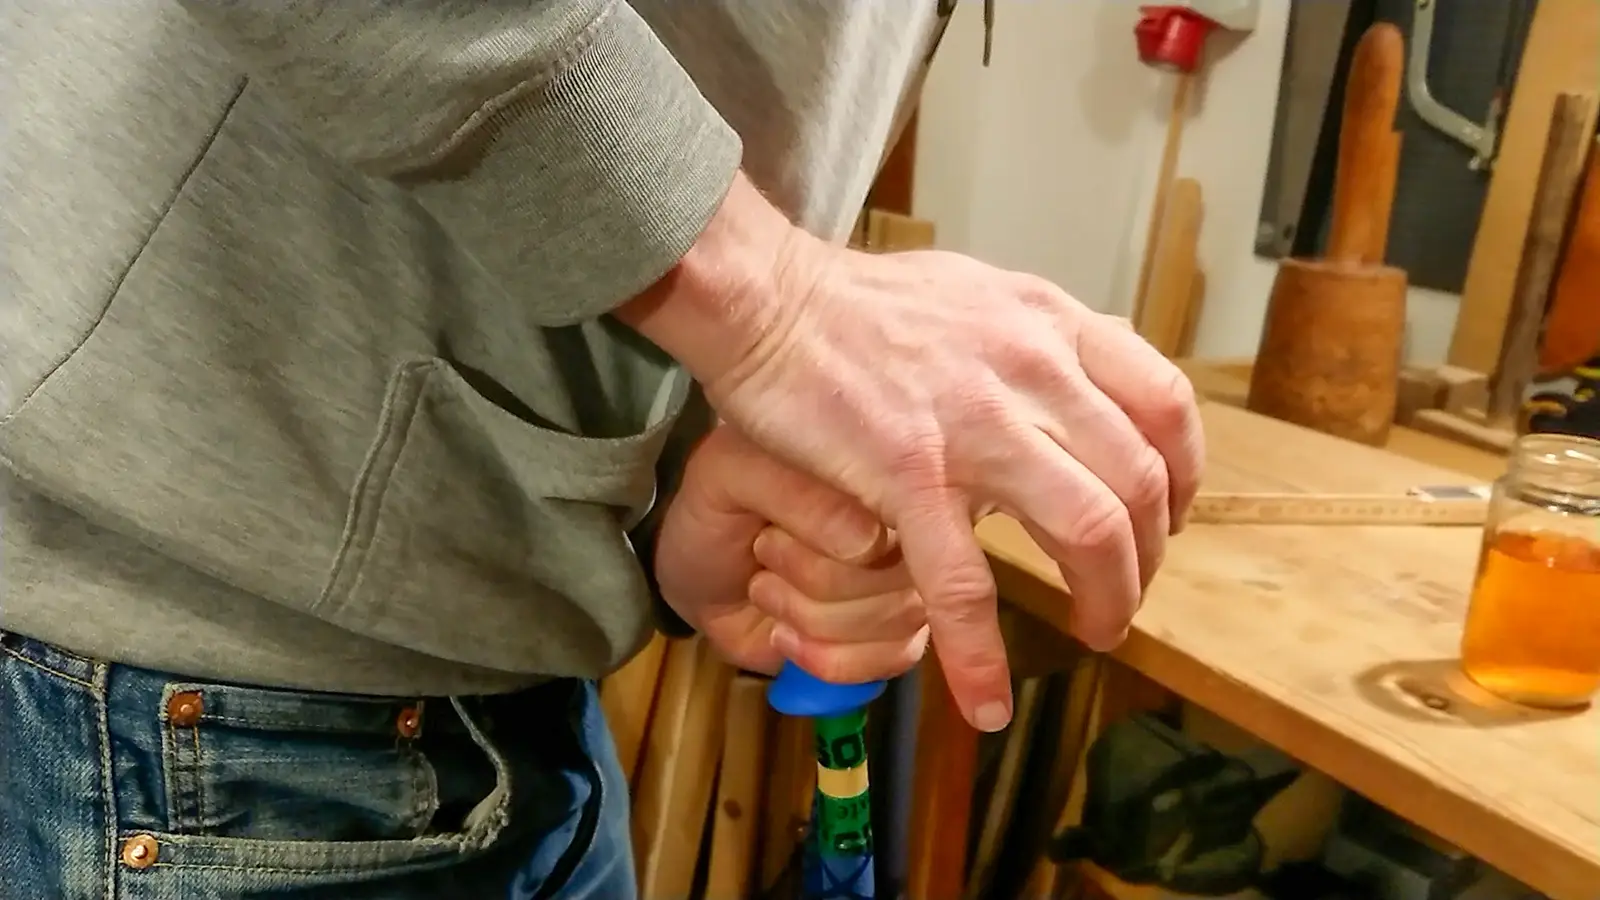
- Press on grip
Drop a little liquid soap into the hole in the grips and press them on to the bamboo shafts.
- Re-attach the strap
Finally, re-attach the pole straps.
- Voilà!
Now you have a pair of longer ski poles.
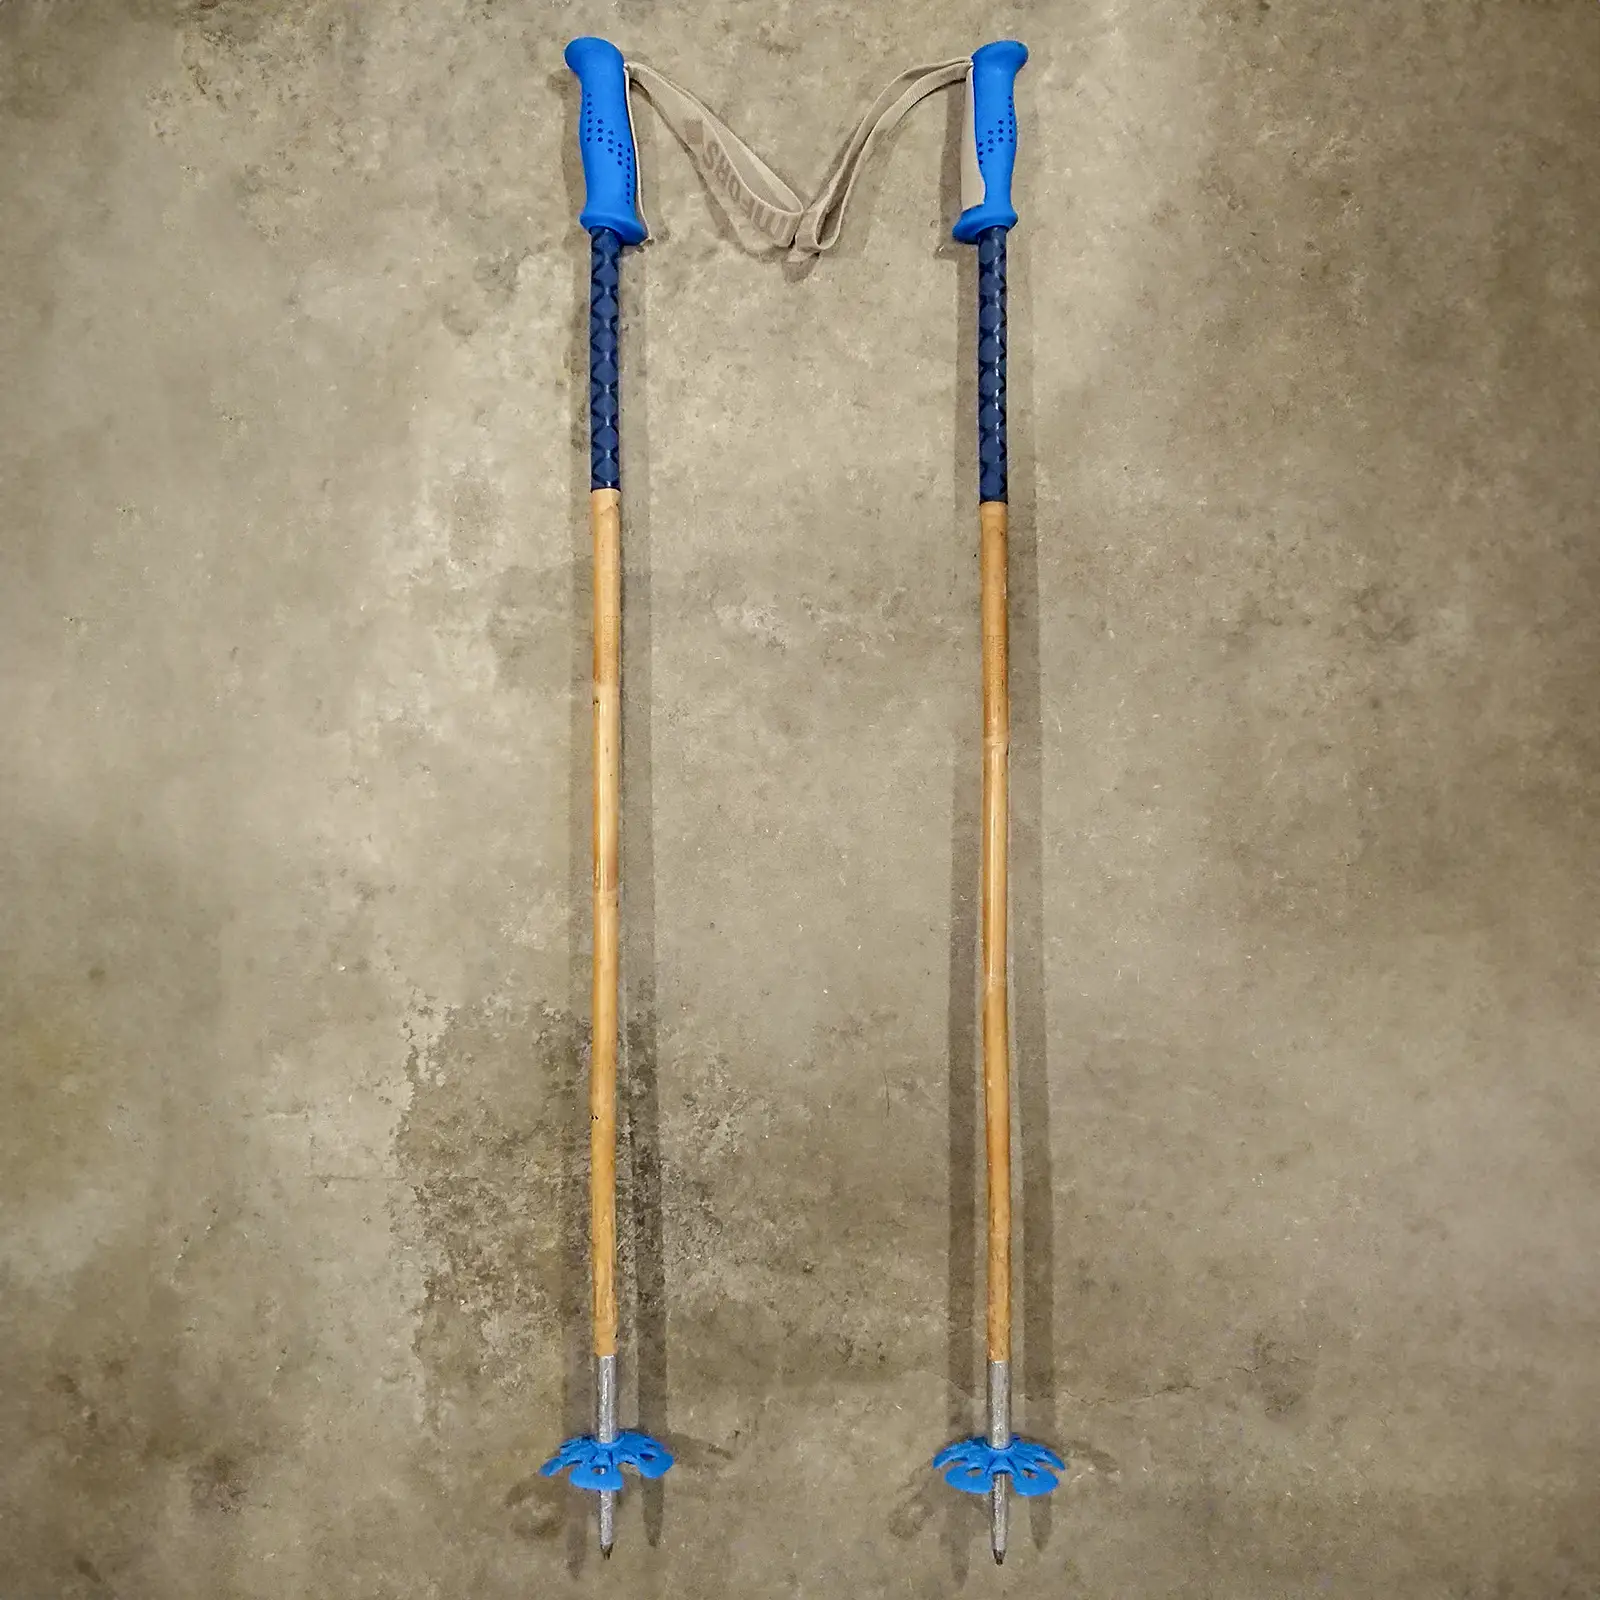
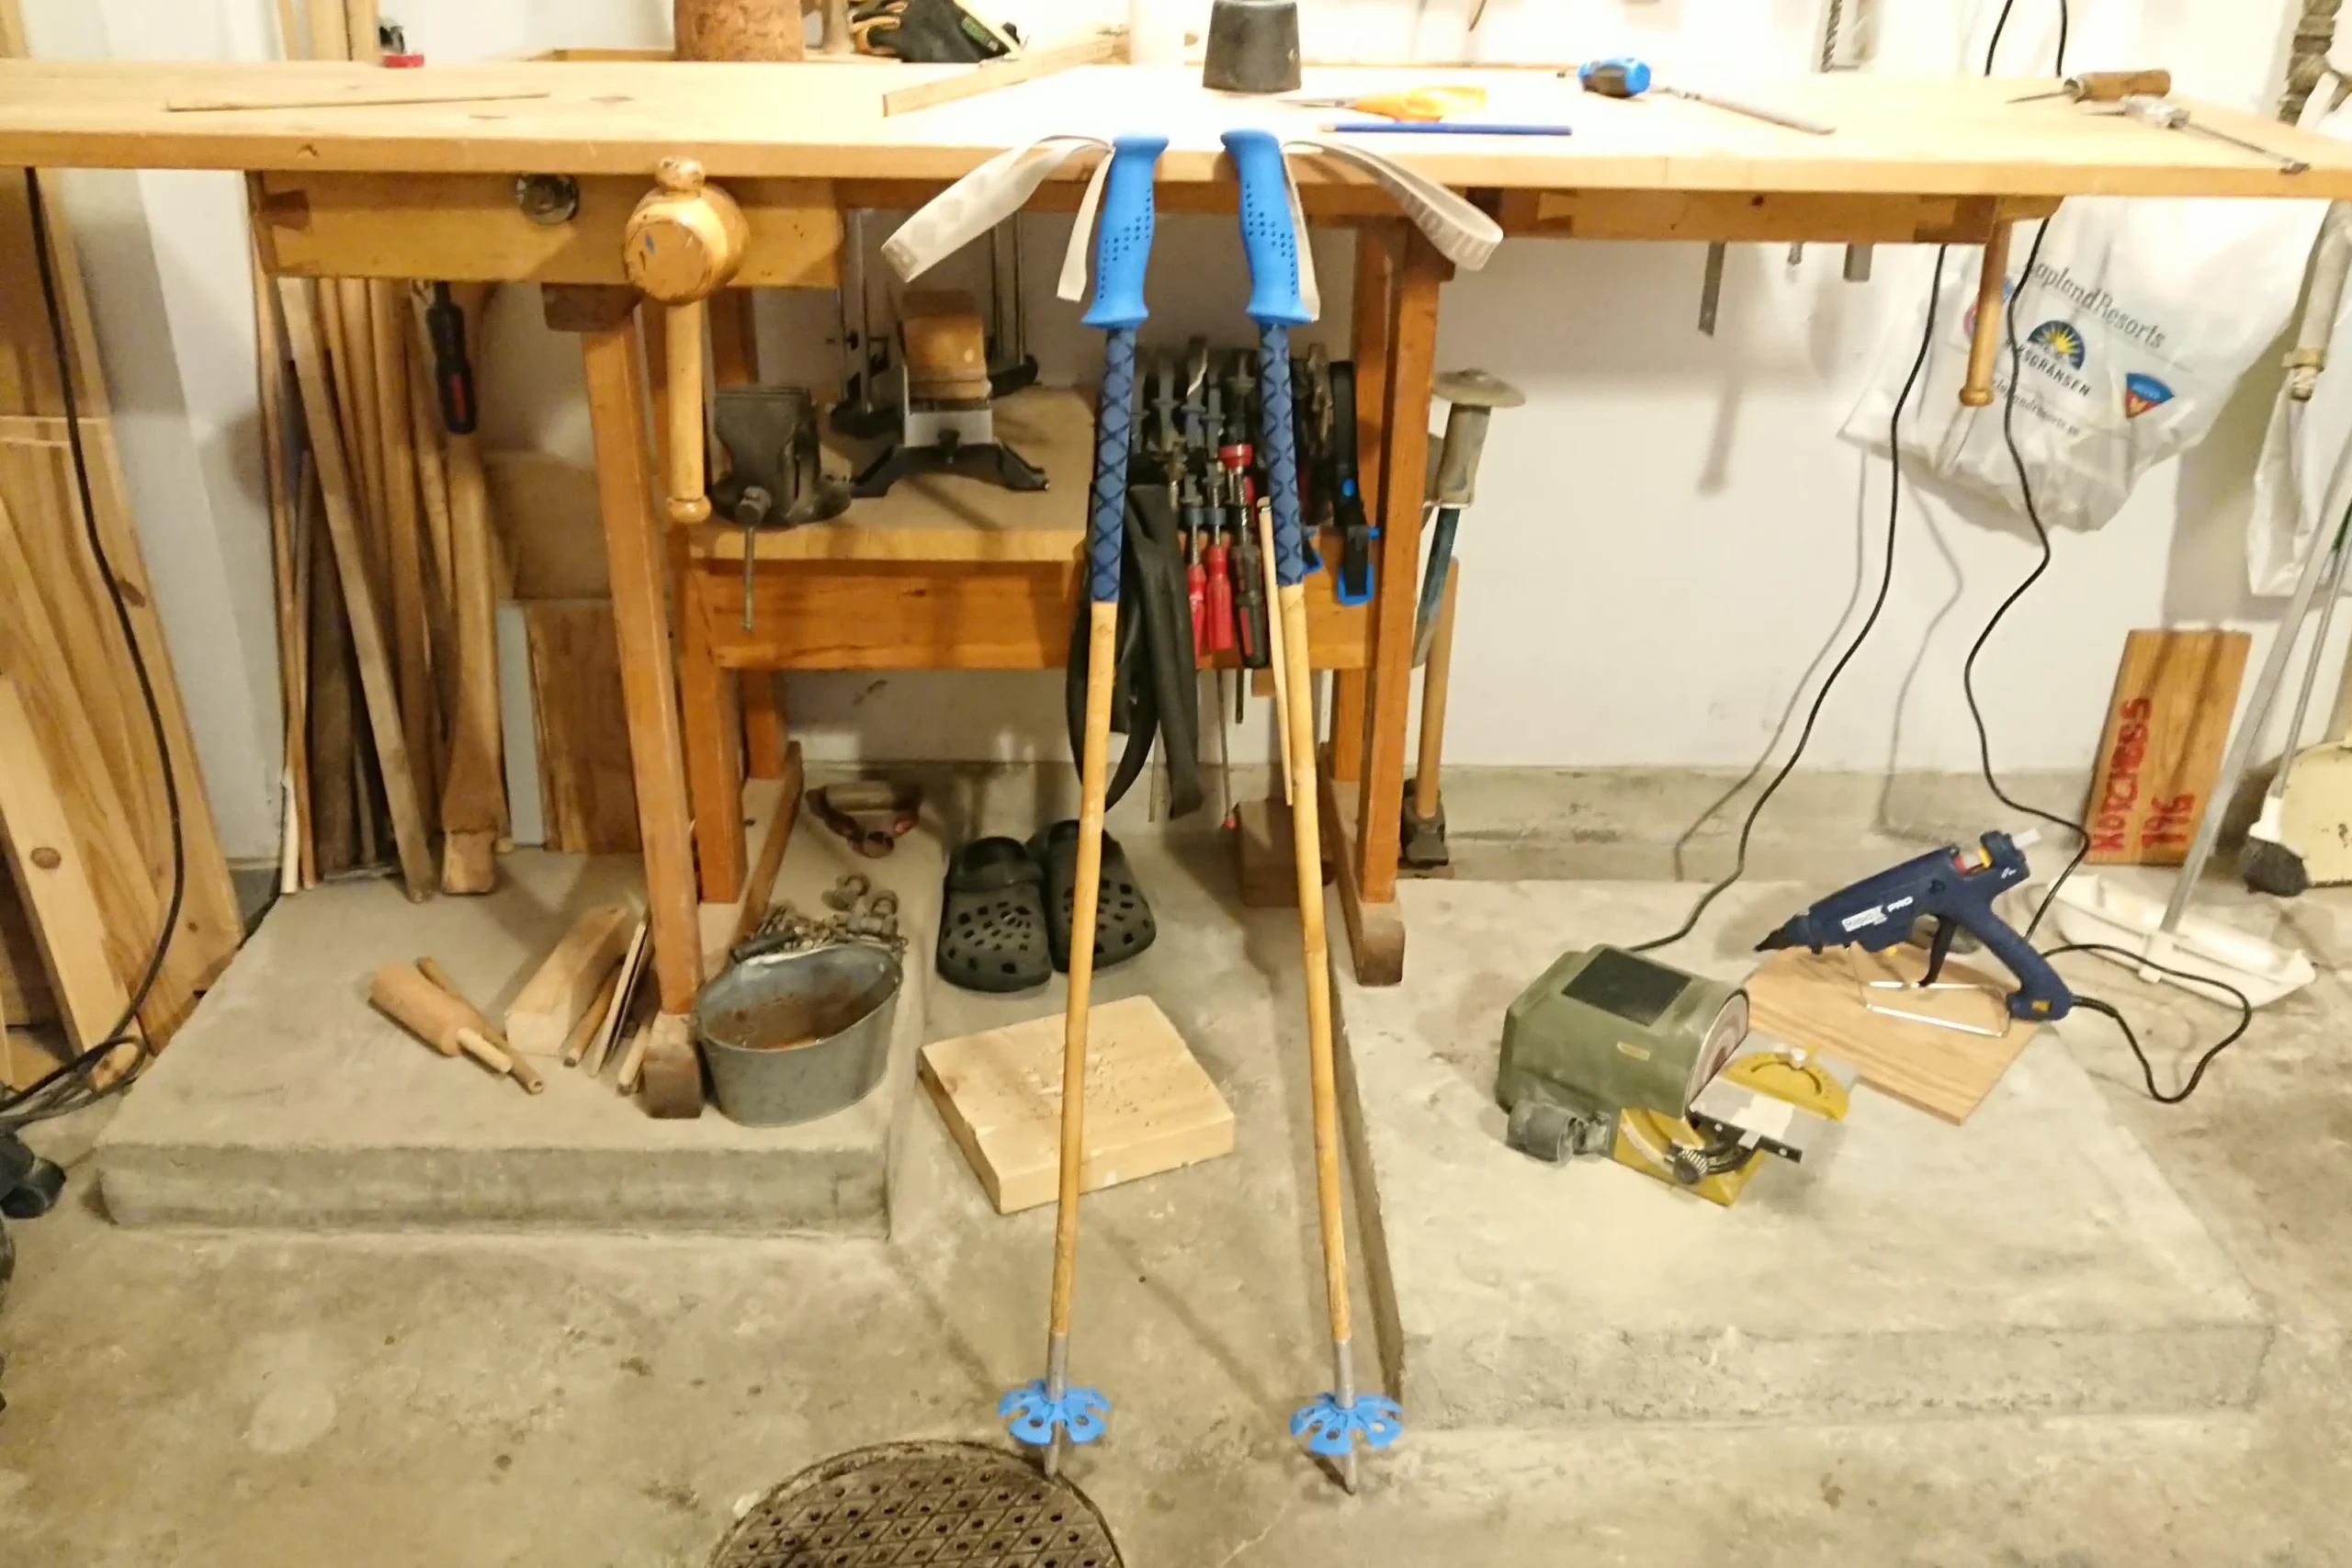
About the poles in my tutorial
For those of you wondering why I used blue non-slip heat shrink tubing on the ski poles above, it’s to cover the engraving underneath. My youngest son wants new graphics of his own and not his older sister’s one. The non-slip tubing also gives you a little extra grip, which can come in handy at times, as when ski touring or boot hiking. I used Ø25 mm non-slip heat shrink tubing. If you want to learn more about making a grip extension check this out!
This specific pair of poles have so far been used by two of my kids, first by my daughter and now by my youngest son. Initially the poles were 95 cm long, and now they are 100 cm. This pair can’t be extended any more. Next time I’ll have to exchange the bamboo cane for a longer one.
Video instructions
PS. When I make poles for my kids, I first cut off the bamboo cane five centimeters longer than the poles should be. Then I make a new mark and cut off those five centimeters. That way, I have two extension pieces ready to be used a couple years later if needed. Then I also don’t need to drill a center hole I only need to match the existing hole with the right sized dowel. I also mark the extension pieces so I know which pole they belong to, and which end is up and down.
Good luck!
Fabian Rimfors